

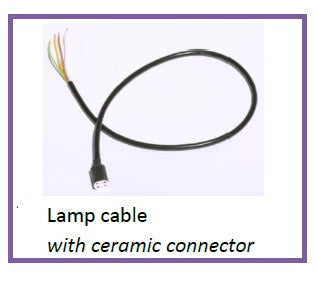
Van Remmen Lamp cables with ceramic Connector 1m, 3m and 6m. 360119, 360213, 360206
Van Remmen Lamp cables with ceramic Connector 1m, 3m and 6m. 360119, 360213, 360206
SKU:3600119

All our orders are sent with tracked courier services
Free Customer Support by experts
Product Description
This Van Remmen lamp lead connects your UV lamp to its ballast or control unit via a heat-resistant ceramic connector, supplied by WrekinWater in 1m, 3m or 6m lengths to suit where your ballast is mounted. It's the genuine cable used on Van Remmen UV disinfection systems, and choosing the right length avoids unnecessary joins or strain on the connection. Replacing a cracked or perished lead keeps the electrical connection to your lamp safe and reliable.
| Type | UV lamp lead with ceramic connector |
| Vendor | Van Remmen |
| Lengths available | 1m, 3m, 6m |
| Connector | Heat-resistant ceramic lamp connector |
| Application | Van Remmen UV disinfection systems |
| SKUs | 360119 (1m), 360213 (3m), 360206 (6m) |
When you need this fitting
- Your existing lamp lead has cracked, scorched or perished insulation near the ceramic connector.
- You're repositioning the ballast further from the UV chamber and need a longer cable run.
- The ceramic connector has discoloured or feels loose on the lamp pin.
- You're fitting a replacement lamp and the old lead is being retired alongside it.
The ceramic connector carries mains-derived voltage to the UV lamp's electrode, and ceramic is used specifically because it withstands the heat generated right at the lamp end without breaking down like a standard plastic plug would. If the cable insulation or connector degrades, you risk an intermittent connection, a lamp that won't strike, or a safety hazard around a wet cabinet. Matching the correct length also avoids taping in extensions, which is never advisable on a mains lead.
WrekinWater is a family-run business based in Bettisfield, Shropshire, that has supplied UV and water treatment parts to more than 50,000 customers over 15 years. We stock genuine Van Remmen leads in all three lengths so you can match your original cable exactly, and we're rated Excellent on Trustpilot for getting the right part out quickly.
How to fit it
- Isolate the mains power to the UV unit before touching any wiring.
- Undo the ceramic connector from the old lamp pin and disconnect the other end from the ballast terminals.
- Fit the new ceramic connector securely onto the lamp electrode pin.
- Route the cable away from the quartz sleeve and any sources of heat or standing water.
- Reconnect the other end to the ballast or control unit terminals, checking the wiring matches the original.
- Restore power and confirm the UV lamp strikes and the monitor, if fitted, shows a normal reading.
Technical Resources

Van Remmen Lamp cables with ceramic Connector 1m, 3m and 6m. 360119, 360213, 360206
Frequently asked questions
For full details on returns, refunds, eligibility, and timeframes, please refer to our complete Refund Policy here:
👉 Refund and Returns Policy
If you are unsure whether your item qualifies for return, please contact our team before sending anything back and we’ll be happy to help.
