

DN20/DN32 Service Kit
DN20/DN32 Service Kit
SKU:6108026680

All our orders are sent with tracked courier services
Free Customer Support by experts
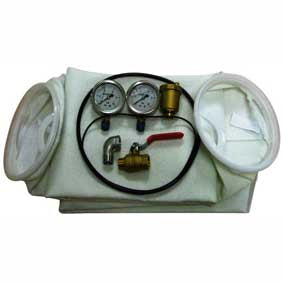
Product Description
This Greenlife DN20/DN32 service kit contains the replacement seals needed to re-service a closed circuit magnetic filter housing on a DN20 (3/4in) or DN32 (1 1/4in) heating pipework run. WrekinWater supplies it as a straightforward maintenance item for anyone carrying out routine servicing or resealing a housing after cleaning. It's sized specifically for the smaller end of the Greenlife closed circuit filter range.
| Compatible housing sizes | DN20 (3/4in) and DN32 (1 1/4in) |
| Kit type | Service/reseal kit (housing seals) |
| Application | Closed circuit (sealed) heating systems |
| Brand | Greenlife |
| Manufacturer SKU | 6108026680 |
| Fits | Greenlife DN-series magnetic filter housings |
Signs you need this part
- Water weeping from around the housing body or end cap when the system is under pressure.
- The housing seals feel hard, flattened or cracked when you last opened it for cleaning.
- You've just removed the magnet bar for its annual clean and want fresh seals before rebuilding it.
- Damp staining or drips appearing on the pipe insulation directly beneath the filter.
The seals inside a closed circuit filter housing are what keep pressurised heating water contained while still allowing the body to be opened for the annual clean-out that magnetic filters need. Heat cycling, plus the glycol and inhibitor commonly dosed into closed heating systems, ages rubber seals faster than the housing itself wears, so a unit that sealed perfectly last year can start weeping once it's reassembled after a service. Fitting fresh seals from this kit at every clean-out avoids a return visit to fix a leak that a few pence of rubber would have prevented.
WrekinWater is a family-run water treatment specialist based in Bettisfield, Shropshire, that has supplied parts like this to more than 50,000 customers over 15 years and is rated Excellent on Trustpilot. Ordering the correct DN20/DN32 kit here means you get seals sized for your specific Greenlife housing rather than a generic assortment.
How to fit it
- Isolate the heating system and let it cool before starting work.
- Close the isolation valves either side of the filter housing to remove pressure from that section.
- Release the union nut or retaining clamp and slide the housing body away from the head.
- Remove the old seals, wipe the sealing faces clean and check for scratches or debris.
- Fit the new seals from the kit, dry, then reassemble the housing and tighten the union hand-tight plus a further quarter turn.
- Reopen the isolation valves slowly and check the joint for leaks before returning the system to normal use.
Technical Resources

DN20/DN32 Service Kit
Frequently asked questions
For full details on returns, refunds, eligibility, and timeframes, please refer to our complete Refund Policy here:
👉 Refund and Returns Policy
If you are unsure whether your item qualifies for return, please contact our team before sending anything back and we’ll be happy to help.
